Button Cookies

Oh, it’s been a long time since the last post! Not due to lack of baking, but rather due to lack of technology. My computer is on it’s last legs and prefers to sit on a shelf rather than being used. Having rearranged some of our rooms and created a zone for a family computer I now have better access – that is when the kids aren’t using it!

The other week my daughter’s class was having a leaving party for their teacher who was going on maternity leave. They had all been asked to bring in some treats and we made these little cute button cookies for her to bring in.

Button cookies

Button cookies

Ingredients
100g Icing sugar
200g Butter
300g Plain flour
0.5 tsp Vanilla extract

Other Equipment
2 small cookie cutters of different size, or one cookie cutter and one bottle lid (such as a milk bottle lid)
Plastic straws

Method
1. Preheat the oven to 150C
2. Cream butter, icing sugar and vanilla extract.
3. Fold in the flour until the dough holds together, taking care not to over-mix it
4. Roll out the dough on a lightly floured work surface until about half a centimeter thick.
5. Cut out rounds using the larger of the cookie cutters, place on a lined baking tray.
6. Press the smaller cookie cutter/bottle lid to make an indentation on the cookie, use equal pressure to get an even circle and take care not to press too hard so it cuts through.
7. Using the straw, make 2 or 4 holes in the centre of the cookie. Twist the straw when pressing down to ensure the dough in the hole comes out clean. Use a skewer to clean out the straw from time to time or cut the straw to remove any dough stuck in it.
8. Bake for 15-20 minutes, until the edges turn lightly golden.
9. Cool on a rack and store in an air tight tin.

Button cookies

Semlor – Lent buns

While Britain gets celebrates Shrove Tuesday with pancakes, Swedes turn to cardamom scented buns filled with almond paste and whipped cream. Originally they were only eaten on Shrove Tuesday, but they now tend to be sold in bakeries from just after Christmas until the beginning of Lent.

Semlor - Lent buns

With part of the family away for Shrove Tuesday this year we waited until the weekend to have our Semlor, as they are called in Swedish. The buns should be light and fluffy, and there is some baking powder included in this dough to help it rise, but I still struggle to get them as light and fluffy as the ones you can buy in bakeries. I blame the cardamon in this case – I’ve never been able to find ready ground cardamon in the supermarkets in the UK, but instead go for cardamon pods and crush the seeds with a pestle and mortar. Unfortunately the freshness of the cardamon seems to have a negative effect on the doughs ability to rise and the buns end up a bit denser than I would like. The overall result is still delicious though!

Selma cut on half

Ingredients
75 g butter
300 ml milk
0.5 tbsp cardamon pods – seeds finely crushed, or 1 tsp ground cardamon
75 ml sugar
a pinch of salt
7 g fast action yeast (1 sachet)
1 egg (for the dough)
900 ml flour
1.5 tsp baking powder
1 egg to glaze the buns with

Filling for about 10 buns
150 g almonds, whole blanched
150 g sugar
2-3 tbsp water
2-3 tbsp milk
300 ml whipping or double cream
icing/powdered sugar for dusting

Method

  1. Melt the butter in a saucepan over a medium heat. Add the crushed/ground cardamon, sugar, salt and milk, and heat until lukewarm.
  2. Combine most of the flour, yeast and baking powder in a large bowl, then pour in the milk mixture and the egg and work into a smooth dough, adding the remaining flour as needed. Leave to rise, covered, for about 40 minutes or until doubled in size .
  3. Place the dough on a lightly floured surface, divide into smaller pieces and shape into round buns. I made mine quite small, about 50g each which gave me about 20 buns.
  4. Place the buns on a baking sheet covered with parchment paper. Leave to rise, covered, for about 30 minutes.
  5. Brush the buns with the remaining, lightly whisked, egg, this is optional though – I forgot to this time, then bake in a preheated oven for 225°C for about 8 minutes – or longer if making larger buns, until golden brown. Leave to cool on a rack.
  6. To make the filling, grind the blanched almonds in a food processor, mix in the sugar and add the water a little at the time until the paste is firm and smooth.
  7. Whip the cream.
  8. Cut a lid of the buns, scoop out some of the inside to make a hole inside the bun and mix with almond paste and a little milk until the paste is loose.
    Fill the buns with the almond/bun paste, top with whipped cream, put the lid back on top and dust with icing/powdered sugar.
  9. The buns freeze well if not using all at once.

Empty plate

Lego cake

For his birthday this year my son asked for a Lego cake – having just been to Lego Land may have had something to do with it 🙂

A quick search online returned lots of amazing Lego cakes, many of them quite intricate. Unfortunately time was limited and I decided to go with a very simple design this time. I had bought a Lego brick silicone mould and made little bricks in different colours out of fondant icing to decorate the cake. A few Lego men were drafted in to help hold the birthday candles and the birthday boy was happy – though he was more interested in eating just the Lego bricks and not very much of the cake.  Lego cake

The day of the birthday party turned out to be quite hectic, and I only managed to take a few pictures of the cake.
Slice of Lego cake

Lego cake

Ingredients
Cake
2 eggs
200 ml sugar
200 ml flour
2 tsp baking powder
100 ml boiling water

Lemon curd mousse
100-200 g lemon curd
500 ml whipping cream
200 g cream cheese

Buttercream icing
150 g butter, at room temperature
200 g icing sugar
about 50 ml boiling water
1 tsp vanilla extract

Ready made fondant icing in different colours

Method
1) To make the cake, preheat the oven to 175ºC and prepare the tin. Cream eggs and sugar until pale and fluffy.
2) Add flour, baking powder and the boiling water and gently fold together until smooth. Pour into the tin and bake for 20-25 minutes, or until golden-brown on top and a skewer inserted into the middle comes out clean. Leave to cook on a rack.
3) Next prepare the lemon curd mousse. Whip the cream until it forms soft peaks.
4) Mix the cream cheese and lemon curd, then add to the whipped cream. Keep chilled until ready to use.
5) For the buttercream icing, start by beating the butter until soft. Add half of the icing sugar and beat until smooth.
6) Add the remaining icing sugar, vanilla extract and a little bit of the boiling water, taking care not to add too much water as the buttercream shouldn’t be too sticky.
7) To assemble the cake, cut the cake into two even layers. Spread the bottom layer with the lemon curd mousse, then add the top cake layer.
8) Cover the cake evenly with a thin layer of buttercream.
9) Roll out the fondant icing and cover the cake.
10) If making Lego bricks in a silicone mould, dust the mould with corn flour before adding the fondant icing to make sure the bricks don’t stick to the mould.

Swedish chocolate truffles

I usually do a lot of baking for the kids birthday parties and take a lot of photos of the bakes but I’m then pretty bad at getting it up on the blog, despite my good intentions.

So, without further ado (as I’ve delayed it long enough) here are the Swedish chocolate truffles that went down a treat with both kids and adults at our last birthday party.
Swedish chocolate truffles in different coatings

Don’t be put off by the coffee in them if making them for kids – the coffee enhances the chocolate flavour rather than tasting of coffee, however it can be substituted with milk or water instead.
Swedish chocolate truffles on tray

Traditionally these little truffles are coated in nib sugar {also called pearl sugar} or desiccated coconut, but for kids parties it’s fun to roll them in multicoloured sugar sprinkles {because kids don’t get enough sugar as it is at parties!!}
Swedish chocolate truffle coated in nib sugar

Swedish chocolate truffles   

Ingredients
100 g butter, at room temperature
100 ml sugar
1 tbs cocoa powder
1 tbs coffee
0.5 tsp vanilla extract
300 ml oats
nib sugar, desiccated coconut or sugar sprinkles

Method
1) Mix the butter, sugar, cocoa powder, coffee, vanilla extract and oats together until thoroughly mixed and a little bit sticky.
2) Take a small amount and roll into a round little ball. I usually make them about the size of a small cherry tomato but they can be pretty much any size you like.
3) Once all the mixture has been rolled into neat little balls, pour your chosen coating onto a plate and roll the balls individually in them until fully coated. Keep chilled until serving.

Swedish chocolate truffle being coated

Tea bag cookies

It’s not long until the summer holidays start now! Last year I made these cute little tea bag cookies for the teachers as a leaving present. I had originally seen just a picture of them in a friend’s Facebook feed, and had to do a bit of googling to find a recipe for them. It turned out it’s just a shortbread biscuit dipped in chocolate.

Tea bag cookies on baking sheet

These ones are flavoured with lemon zest, but they could just as well be flavoured with orange zest, cardamom, vanilla, cinnamon or left plain – whatever takes your fancy. There are loads of different recipes available for them – I ended up following the recipe on a French blog called Le Pétrin, which have some of the prettiest versions of them, having utilised the Google Translate services to read it {my French is a bit rusty}.

IMG_2711_small
To cut out the cookies, make a template. You can make one out of cardboard but I felt it would take too long to cut one out at the time, and instead cut long strips initially which I then cut to size and trimmed the corners to give it the tea bag shape.

Making tea bag cookies
I bought ready made blank tags which we decorated ourselves, but there are lots of templates available with pretty tea pots and other things to print out yourself.

IMG_2716_small
Tea bag cookies

Ingredients
180g butter or margarine, softened
70g icing sugar
lemon zest, about quarter to half a lemon
1 egg yolk
20ml freshly squeezed lemon juice
1 pinch of salt
280g flour
100g dark chocolate (or more… can’t remember how much I actually used)

Method
1) Beat the butter until soft and creamy, add the icing sugar and continue beating until smooth.
2) Add the lemon zest, egg yolk and lemon juice and mix thoroughly until everything is well incorporated.
3) Gradually sift in the flour and salt and stir until everything is well incorporated and you have a stiff dough.
4) Form the dough into a ball, flatten it to a thick disc, cover with plastic wrap and chill in the fridge for a minimum half an hour.
5) Preheat the oven to 180C.
6) Lightly flour the work surface. Roll out the dough to about 5 mm thickness.
7) Cut out cookies using a template. Make a whole at the top of each with a straw or piping tip/nozzle – the hole should be about 4mm wide.
8) Place the cookies on a baking tray covered with baking parchment. If possible, refridgerate the cookies for twenty minutes before baking, to allow them to rest and better keep their shape.
9) Bake for about 15-18 minutes until still quite pale with a gold trim. Let cool 5 minutes before transferring them to a wire rack to cool completely.
10) Melt the chocolate and dip the cookies about half way up in chocolate and leave to set for several hours, preferably over night.
11) Tie the lables onto the cookies and voila! – your tea bag cookies are done!

Tea bag cookie

Tea bag cookies on plate


Lemon strawberry cake – and a new kitchen

Summer finally seems to have arrived in Scotland! And with it the chance to relax a bit. The past six month have been very busy – we moved house in the beginning of the year, and I now appreciate why they say moving house is one of the most stressful events that can occur throughout your life. Although having moved several times in the past {including between countries}, I found moving with kids and gutting and redecorating the whole house immediately on entry meant the experience was taken to a whole new level!

Living without a kitchen for three weeks was also an experience. Getting a brand new kitchen at the end of the process was definitely worth it though! Just in case you are a tiny bit curious, this is how our kitchen looked for about two months before it got ripped out…
Kitchen_before
We weren’t using any of the drawers or cupboards, which is why everything was piled on top of the counter.

We then had to use this for three weeks..
Kitchen_during_renovation
…while the kitchen looked like this…
Kitchen_gutted

…before finally getting our new kitchen!
New_kitchen

It’s now a pleasure to cook and bake again. One cake I make every summer, usually as a birthday cake as there are a lot of summer birthdays in our family, is this one.
Lemon_strawberry_cake
I usually make it in a round tin, and without lemon curd in the filling, but I thought I’d mix it up a bit when some friends came round recently. The sponge is flavoured with lemon zest and the addition of lemon curd in the filling makes it very fresh. If you don’t want to fill it, the sponge cake is very good on it’s own too.

Lemon Strawberry Cake

Ingredients
2 eggs
250 ml  sugar
300 ml  plain flour
3 tsp baking powder
1 lemon, zest finely grated or 1 tsp vanilla extract
80 butter
225 ml milk

Filling
3-4 tbsp lemon curd
300 ml whipping or double cream
1 punnet of strawberries
possibly a little bit of icing sugar

Method
1) Preheat the oven to 175 degrees and prepare the cake tin.
2) Whisk eggs and sugar until pale and fluffy.
3) Gently mix in flour, baking powder and grated lemon zest (or vanilla extract if using)
4) Melt the butter in a saucepan, add the milk and once hot pour over the batter. Gently stir until smooth.
5) Pour into the prepared tin and bake for about 30 mins, until golden and an inserted skewer comes out clean. Leave to cool.
6) Once cool, slice the cake into two or three layers and whip the cream.
7) Spread each of the layers (apart from the top one) with lemon curd, then add whipped cream and top with sliced strawberries. For the top of the cake, either spread it with the remaining cream or lightly dust with icing sugar and decorate with whole or halved strawberries.

Lemon_strawberry_cake2

Gingerbread biscuits

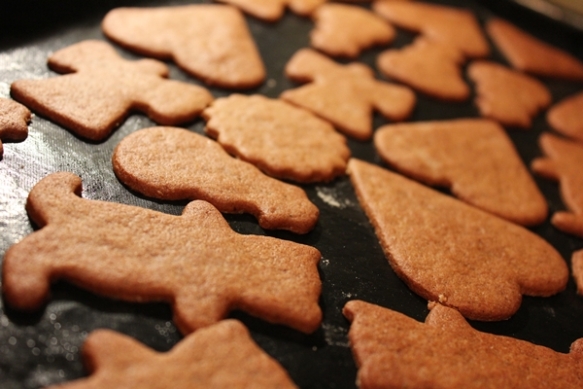
Mention Christmas baking and every country has their own specialities; Christmas cake, Christmas pudding, mince pies, Stollen, lebkuchen, Buche de Noel… the list goes on. To me Christmas is saffron buns and gingerbread biscuits.
Baked gingerbread biscuits

When I first moved to the UK I used to buy gingerbread dough from IKEA. One year they were sold out, and I decided to have a go at making my own.
I found a recipe that was nice enough, but I felt something was missing from it, so in the end I asked my mum for hers – it was pretty similar to the one I had used, but with the addition of cardamom. Using her recipe instead brought me straight back to childhood!
Cutting out gingerbread biscuits

I haven’t been able to find ground cardamom in any supermarket here, so I get whole cardamom pods instead, take the seeds out and ground them in a pestle and mortar. I haven’t figured out how many cardamom pods you need to get the amount in the recipe, I usually just estimate and add a few more than the ground amount {last I made them I used about 1½-2 tsp of whole cardamom pods which gave them quite a kick}. Don’t be tempted to leave it out due to the extra step of grounding them up {unless you are making them for decoration and not eating, in which case it won’t matter} as it’s what gives them a bit of heat. In fact, the literal translation of the Swedish word ‘pepparkakor’ is ‘peppercakes’, so they should have a bit of heat, which the other spices doesn’t manage to provide on their own.
Gingerbread biscuits with star cut out

Baking tips
– If making these for eating, make them as thin as possible – 2mm is ideal for thin and crispy biscuits, and the flavour somehow ends up different than to thicker ones. If they are for decorating and hanging in the tree for example on the other hand, they should be thicker, and some of the spices could be left out
– There is a darker ‘baking syrup’ available in Sweden that’s usually used in these. In order to get some of the darker colour, and a bit of richness, I add a tablespoon of treacle to the dough, and usually reduce the amount of golden syrup with about the same amount.
– Only roll out a small amount of dough each time instead of the whole dough – it’s much easier to get them thin that way.
– Use a timer when baking them! You’ll be able to tell by the smell when the first batch is ready, but after four or five batches your whole kitchen will be filled with heavenly gingerbread scents and you won’t be able to tell when the batch in the oven is done. If you make them very thin they go from just right to burnt in no time. Set the timer for the shorter time initially and adjust it after a few batches.
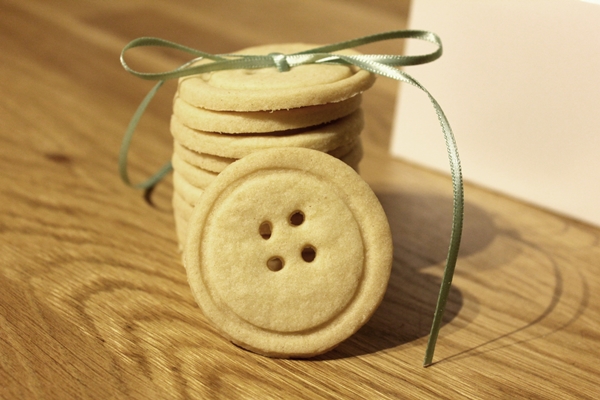
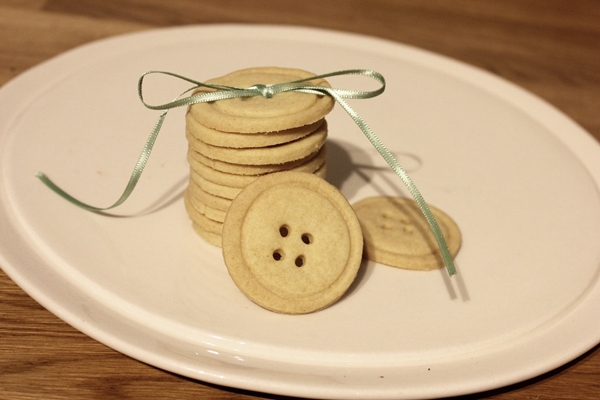
– The recipe makes about 175 biscuits, which may sound a lot, but you don’t have to make them all at once – the dough keeps well covered in the fridge for a few days, ready to be baked off when needed. It’s also worth remembering it’s hard to have just one at the time, having two, three or four is more like it, and not considered greedy if you make them small! Plus they are a great gift for friends and family, kids love making them and it doesn’t matter if they {and you!} have a bit of the dough while making them 🙂
Gingerbread biscuits and cutters

Gingerbread biscuits

Ingredients
150 g butter
250 ml sugar
50 ml golden syrup
1 tbsp treacle (optional – reduce the golden syrup by same amount if using)
1 tbsp ground cinnamon
½ tbsp ground ginger
½ tbsp ground cloves
1 tsp ground cardamom (about 1½ tsp whole cardamom pods, seeds ground in a pestle &  mortar)
½ tsp bicarbonate soda (baking soda)
100 ml water
750 ml plain flour

NOTE: Swedish recipes tend to use volume for measurement instead of weight, and I keep forgetting to check the weights when making them…

Method
1) Stir the butter, sugar and golden syrup (+ treacle if using) until smooth. Add the spices and bicarbonate, stir until incorporated, then add water, stir again, and finally the flour – stirring it all together until a smooth dough.
2) Cover the dough and leave in the fridge for at least a day to allow the dough to rest and the spices to develop and marry. {Though it would probably be fine just to leave over night}
3) When ready to bake, take a piece of dough out at a time – leaving the rest in the the fridge. Knead the dough a bit, dust your work surface with some flour and roll it out until very thin – about 2mm.
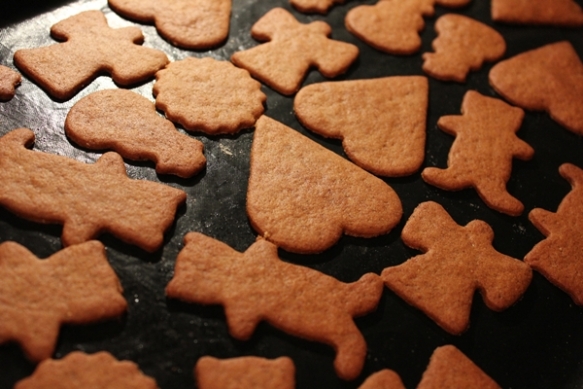
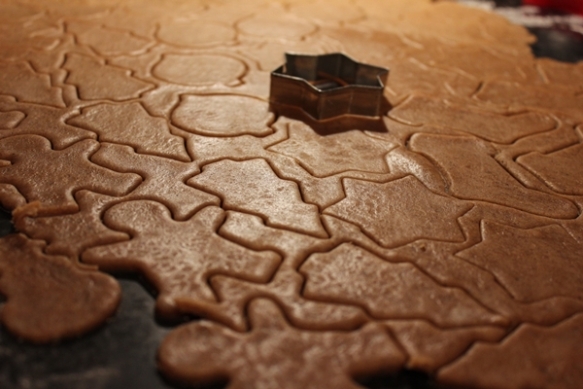
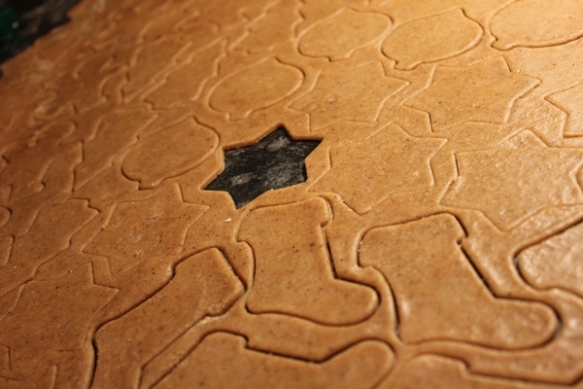
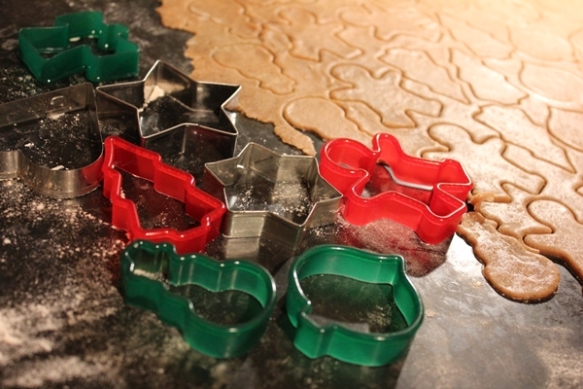
4) Use cookie cutters to cut out different shapes, or {if you don’t have any} use a measuring cup or a glass. Place the biscuits on a baking sheet lined with parchment paper.
5) Preheat the oven to 200-225C and bake in center of oven for 4-5 minutes until golden brown – taking care not to leave them in for too long as they catch very easily.
6) 
Let cool a few minutes on the baking sheet before transferring them to a cooling rack to leave to cool completely. Store the biscuits in an airtight tin.

Baked gingerbread biscuits

Apple jelly

When we moved into our house there were a small little apple tree one corner of the garden. The first year we lived there it produced about three apples. Fast forward eight years and the tree hasn’t grown much {it keeps getting battered it in the wind and seems to have decided it’s safer to hide behind the fence}, the crop on the other hand has increased tremendously – this year we got about three large bowlfuls!  IMG_2806_small

After a few apple crumbles I started thinking about what else I could use all the apples for. They were a bit tart so the kids weren’t keen on just eating them, however I remember having bought some lovely apple jelly a few years ago.  A quick google came up with several good recipes, in the end I settled for one by David Lebovitz.

When making jelly you need a jelly strainer, to strain the fruit juices from the fruit pulp. I was only able to find a jelly strainer bag and not a stand, which the bag is usually attached to and placed on top of a bowl. The instructions for the strainer bag did suggest attaching a hook underneath a shelf to hang the bag from. Our kitchen cabinets are ridiculously low though, and I didn’t fancy attaching a hook to them, so I improvised and stuck a wooden spoon between the handles of two of the cabinets and hung the bag from it – it worked a treat!

IMG_2813_small
If you can’t find a strainer bag, a clean muslin or tea towel can be used – one site recommended sterilising it by ironing it then lining a mesh sieve or just tie the ends into a knot and find a way of hanging it – do note that the apple pulp tends to be quite heavy, so it needs to be hung from something that can carry the weight.

Apple jelly

Apple jelly

Ingredients
2 kg apples
900g sugar
1 lemon, juice only
water to cover the apples

Method 
1) Rinse the apples and cut them into chunks, removing any bruised bits. There is no need to peel them first, or to remove the pips – just add it all to a large stock pot {I ended up having to use the two largest pots I had, neither which are proper stock pots, as I had so many apples}
2) Cover the apples with water, cover and bring to a boil. Lower the heat, leave the lid askew, or take it off, and simmer the apples for about 30 minutes, until they are soft.
3) Place the jelly strainer over a large bowl and ladle the apple and liquid into the jelly bag. Most recipes recommend to leave overnight or at least 3 hours. I left mine for about 3 hours and by the end of that time there was no more liquid coming though. It’s important to NOT try to push the fruit down to extract more juice as this will result in a cloudy jelly.
4) Measure out the strained liquid and add 150g sugar per 250ml juice. Add the juice, sugar and lemon juice to a pot and bring to a boil. I found that jelly takes a lot longer to set than jam – some more lemon juice would possibly have helped it set faster, but I only had one lemon at the time. The jelly should set at 104C however, at this point mine was still a runny mess. About half an hour later {at least!} and after about a third of the liquid had reduced mine finally set. David Lebovitz mentions his took time to set as well, his didn’t didn’t set until at 110C, and although mine started setting at 108C I left it to 110C just to be sure it wouldn’t be too loose.
If you don’t have a candy or digital thermometer, spoon a little bit onto a chilled saucer {I kept a few in the freezer while I was making the jelly to keep them chilled}. Return the saucer to the freezer for a minute or so and then run a finger gently through the jelly – if it wrinkles it’s set and is ready to pour into jars,  skiming away any white scum that rises to the surface beforehand. {I found it easiest to do this once I had taken the saucepan off the heat}
5) Make sure you have sterilised you jars by washing them in hot soapy water, rinse with hot water then place in a low oven (about 100C) to dry and sterilise. Take one jar out of the oven at the time when you are ready to add the jelly to them.
6) Ladle the jelly into jars and screw the lids on tightly. I ended up with 5.5 jars of varying sizes, the largest ones probably held approximately 300ml.

The jelly is lovely with pork, as an alternative to the traditional apple sauce, or with cheese and biscuits.

Apple and jelly

Little strawberry and marzipan cakes

As mentioned a while ago, there are a lot of summer birthdays in my family. I never had a chance to make my hubby a cake on his birthday, but I made these little cakes the following weekend instead.
Little strawberry and marzipan cakes
When making the pirate cake for my son, I had opened a packet of marzipan instead of icing by mistake. Not wanting to waste the marzipan, I made little strawberry cakes wrapped in marzipan – inspired by the traditional Swedish Princess cake {which I made last year for my son’s birthday}. Very simple but pretty little cakes!
Mini strawberry and marzipan cakes
Little strawberry and marzipan cakes

Ingredients
3 eggs
200 ml sugar
2 tbsp water
200 ml flour
1.5 tsp baking powder
200 ml whipping cream
100 ml custard (ready made or from powder)
1 tbsp strawberry jam
strawberries to decorate, 1-2 per cake
about 250g marzipan + a few drops of red food colouring  (enough for 4 cakes, use more if making more cakes)

Method
1) Preheat the oven to 200C and line a deep baking tray or large roasting tin with greaseproof paper.
2) Beat eggs and sugar until pale and fluffy.
3) Add the water, flour and baking powder and gently combine.
4) Pour onto the baking tray and bake for about 5 mins or until golden.
5) Leave to cool, then cut out circles with a cookie cutter or a glass, about 5 cm / 2 inches wide. You’ll need three discs for each cake.
6) Whip the cream, and mix about a third of it with them custard.
7) Spread the bottom layer of the cake with the jam and then add some custard cream on top.
8) Add the middle cake layer and spread it with whipped cream before adding the top layer and a final thin layer of cream.
9) Add the food colouring to the marzipan and knead it until it’s evenly coloured. Roll out the marzipan until a few millimeters thick.
10) Measure how high the cake is and cut out a ribbon of marzipan the same height and wrap around the cake. Trim off any excess. Repeat for all the cakes.
11) Slice the strawberries and decorate the cakes.

Arrr, pirate cake!

My youngest is all into pirates at the moment and keeps running about shouting “ahoy, pirate ship” {he hasn’t quite figured out there is a difference between ‘pirates’ and ‘pirate ships’!}. For his recent birthday, a pirate theme was a given!

I wanted to make him a pirate cake and when doing some research I found some truly amazing pirate cakes in the shape of three dimensional pirate ships and treasure chests. I’ve never been good with 3D cakes though, instead I decided on a simple pirate head cake. But, never one for making it easy for myself, I wanted to jazz up the flavours a bit. Rather than using the traditional jam and buttercream filling, I settled on a raspberry mousse and a ‘toffee mousse’, which is usually called ‘fluff’ in Sweden – not to be confused with marshmallow fluff though. This is basically sweets {toffees, chocolates, foam sweets or jelly sweets – pretty much anything will do} melted in cream and later whipped like normal cream. It’s very popular as a cake filling but works equally well to frost cupcakes. Not the least be healthy, but hey, birthday cakes aren’t supposed to be!

I started off by making a sketch of the cake, to use as a guide when decorating it. I had initially thought about cutting out parts of it to use as a stencil, but ended up free-handing when decorating it. Pirate cake sketchI bought red and black icing, to make it a bit easier on myself, and then coloured some white icing to make it skin toned {as my local supermarket doesn’t stock that}. Some more research recommended mixing red, yellow and a bit of green food colouring to get a skin tone. I ended up having mix the colours a couple of times before adding it to the icing, as the red became too predominant initially – so go easy on the red! Another thing worth noting is, put some of the white icing away before adding the colour, to be able to make the white dots for the head scarf, unless you want to send your husband out late at night to get more white icing!Pirate cake

Pirate cake

Ingredients
Cake
4 eggs
200 ml sugar
100 ml potato flour
100 ml plain flour
2 tsp baking powder

Raspberry mousse
200 g raspberries
1 tbsp sugar
50 ml water
2-3 gelatine leaves
200 ml whipping cream

Toffee mousse
300 ml whipping cream
180 g toffees

Buttercream
120 g  butter, softened
300 g icing sugar
3 tsp boiling water
1 tsp vanilla extract

Icing or sugarpaste in various colours

Method
1) The day before making the cake, gently heat the cream for the toffee mousse in a saucepan along with the toffees until they have melted completely. Make sure the cream doesn’t boil, as it won’t be possible to whip the cream later if it does.
2) Once the toffee cream is cool, pour it into a bowl, cover and chill in the fridge over night.
3) To make the sponge for the cake, preheat the oven to 175C and prepare a 23cm cake tin
4) Whisk the eggs and sugar until light and fluffy.
5) Add the potato and plain flour along with the baking powder and gently mix in until fully incorporated.
6) Bake for 45-50 mins or until golden and a skewer inserted comes out clean.
7) Leave to cool.
8) To make the raspberry mousse, put the gelatine leaves in a bowl and cover with cold water. Leave for a few minutes until they have softened.
9) Meanwhile, heat the raspberries with the sugar and water in a saucepan over a low heat. Keep stirring until the raspberries start to break down into a puré. Once they are warmed through, add the softened gelatine leaves and stir until dissolved. Leave to cool.
10) Whip the cream for the raspberry mousse until soft peaks form. Add the cool raspberry puré and mix together. Keep chilled until ready to use.
11) To make the toffee mousse, whip the chilled toffee cream until stiff peaks form.
12) To make the buttercream, beat the butter until soft. Add about half of the icing sugar and beat until smooth. Add the remaining icing sugar, the vanilla extract and one tablespoon of the water and beat the mixture until creamy and smooth. Beat in the rest of the water a little at the time, if necessary, to loosen the mixture until smooth.
13) Cut the cake sponge into three layers. Add the raspberry mousse to the first layer and the toffee mousse to the second layer before adding the final sponge layer on top.
14) Cover the whole cake with the buttercream before adding the icing and decorating it.

Pirate cake with candels