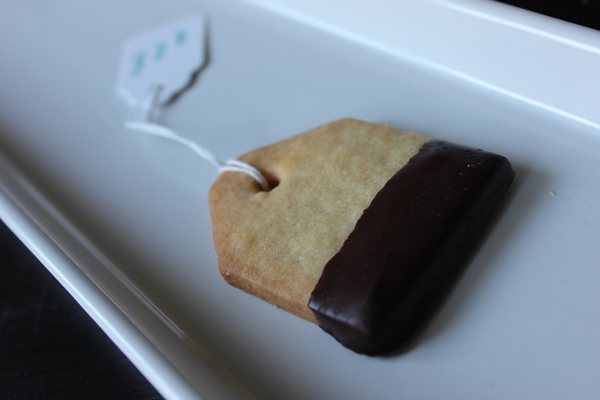
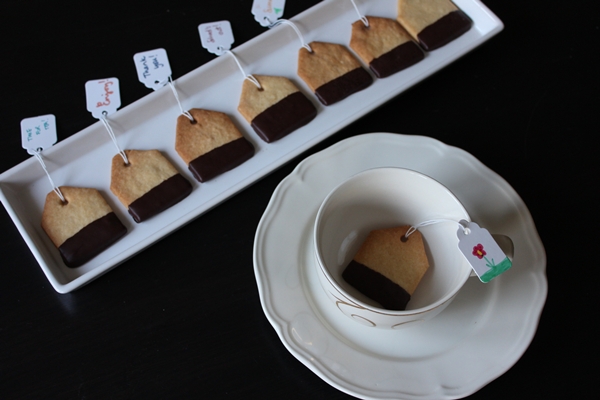
It’s not long until the summer holidays start now! Last year I made these cute little tea bag cookies for the teachers as a leaving present. I had originally seen just a picture of them in a friend’s Facebook feed, and had to do a bit of googling to find a recipe for them. It turned out it’s just a shortbread biscuit dipped in chocolate.
These ones are flavoured with lemon zest, but they could just as well be flavoured with orange zest, cardamom, vanilla, cinnamon or left plain – whatever takes your fancy. There are loads of different recipes available for them – I ended up following the recipe on a French blog called Le Pétrin, which have some of the prettiest versions of them, having utilised the Google Translate services to read it {my French is a bit rusty}.
To cut out the cookies, make a template. You can make one out of cardboard but I felt it would take too long to cut one out at the time, and instead cut long strips initially which I then cut to size and trimmed the corners to give it the tea bag shape.

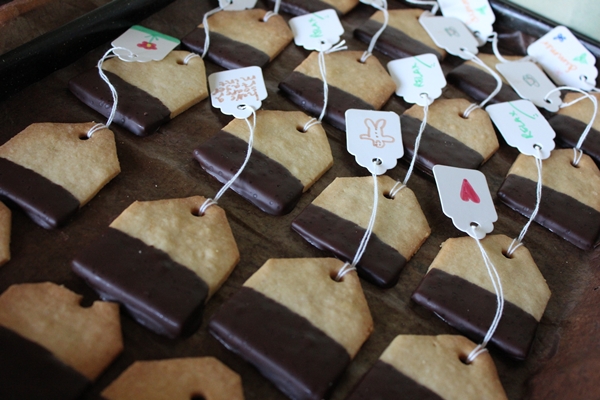
I bought ready made blank tags which we decorated ourselves, but there are lots of templates available with pretty tea pots and other things to print out yourself.
Tea bag cookies
Ingredients
180g butter or margarine, softened
70g icing sugar
lemon zest, about quarter to half a lemon
1 egg yolk
20ml freshly squeezed lemon juice
1 pinch of salt
280g flour
100g dark chocolate (or more… can’t remember how much I actually used)
Method
1) Beat the butter until soft and creamy, add the icing sugar and continue beating until smooth.
2) Add the lemon zest, egg yolk and lemon juice and mix thoroughly until everything is well incorporated.
3) Gradually sift in the flour and salt and stir until everything is well incorporated and you have a stiff dough.
4) Form the dough into a ball, flatten it to a thick disc, cover with plastic wrap and chill in the fridge for a minimum half an hour.
5) Preheat the oven to 180C.
6) Lightly flour the work surface. Roll out the dough to about 5 mm thickness.
7) Cut out cookies using a template. Make a whole at the top of each with a straw or piping tip/nozzle – the hole should be about 4mm wide.
8) Place the cookies on a baking tray covered with baking parchment. If possible, refridgerate the cookies for twenty minutes before baking, to allow them to rest and better keep their shape.
9) Bake for about 15-18 minutes until still quite pale with a gold trim. Let cool 5 minutes before transferring them to a wire rack to cool completely.
10) Melt the chocolate and dip the cookies about half way up in chocolate and leave to set for several hours, preferably over night.
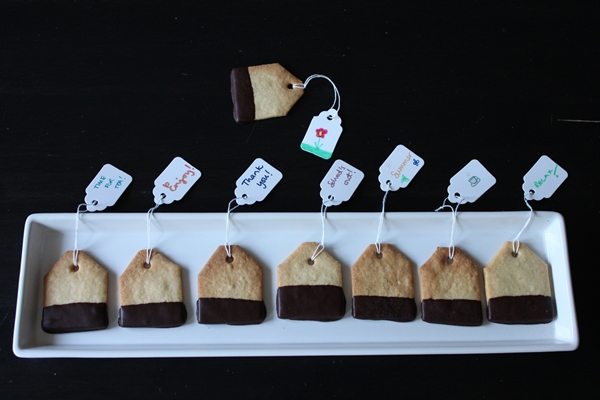
11) Tie the lables onto the cookies and voila! – your tea bag cookies are done!